User interfaces have evolved in ways of helping people interact with machines and even though we now describe the screen, it is not always a walk in the park. A screenshot is frequently used to clarify a topic if you need any kind of assistance locally or want to help someone.
As simple as taking a screenshot is on an Android phone, it’s more complicated if you’re doing so in the context of using Android Auto. However, you can capture a screenshot without any problem. Here’s how it works on any phone running Android.
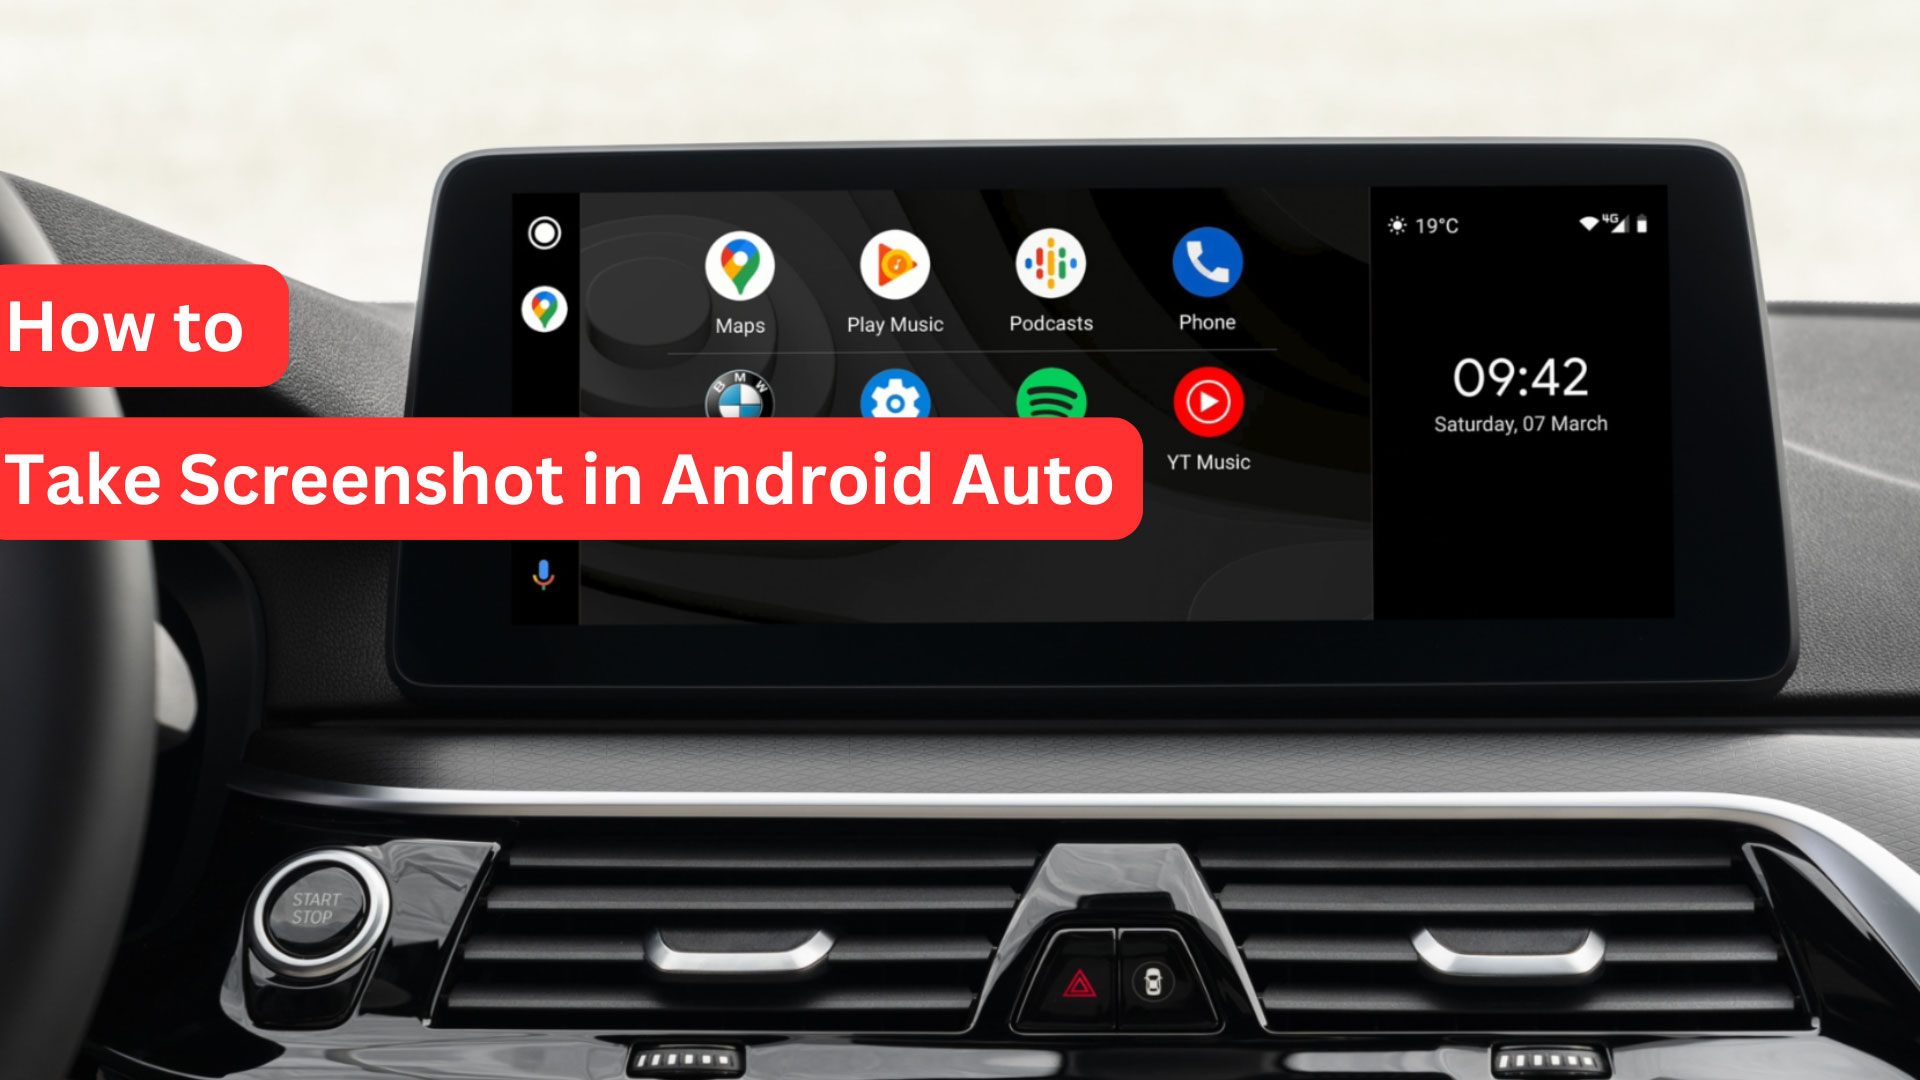
How to Take Screenshot in Android Auto
So, here are two steps taht you need to follow in order to take screenshot in Android auto:
Steps 1: Enable developer settings
There is a piece of the puzzle here though. But, you first have to get developer settings enabled on your phone (after all, taking screenshots in Android Auto while driving can be dangerous!). This step allows you to get more options that are usually not an option by default.
- Either manually plug an Android phone into the car or connect wirelessly.
- So once you get connected, select Android Auto settings on your phone.
- If you have a Samsung phone, then it will be Settings > Connected Devices > Android Auto.
- On Pixel handsets, select Connected Devices > Connection Preferences > Android Auto.
- If you’re unsure of the location, one easy place to look is in your phone’s settings and search for Android Auto.
- Head into the Android Auto settings by scrolling to the very bottom of the page, and then tap your version number 10 times or so.
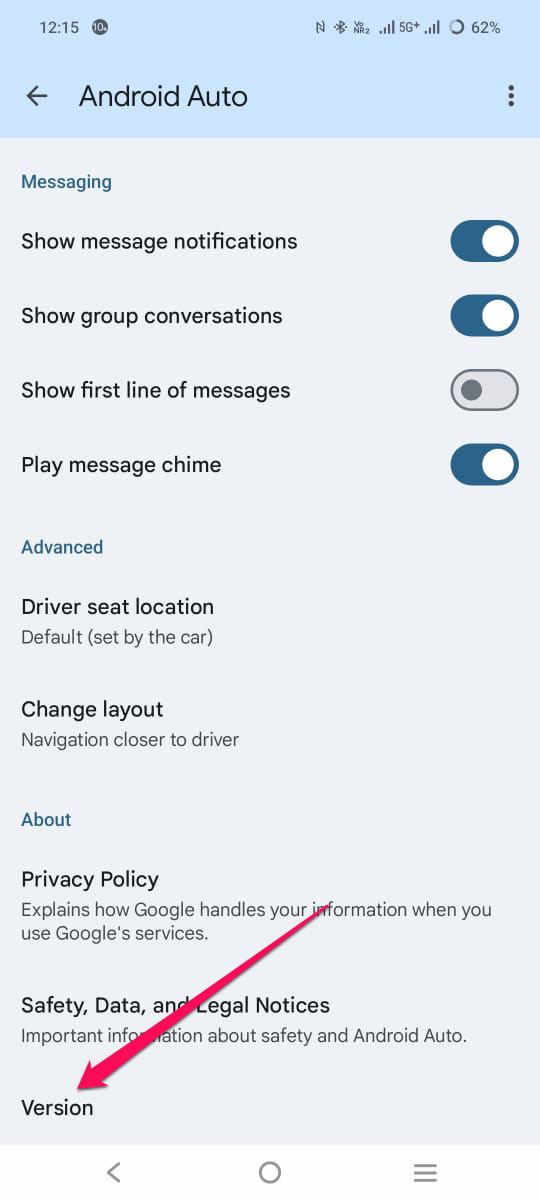
- Tap OK when asked if you want to enable developer settings.
- You really should not tweak the other settings unless you before know what to do, so only use it for saving a screenshot.
Step 2: Take a screenshot
Navigate to the menu on your phone in order to take an Android Auto screenshot (source). Before performing the following steps, it is ideal to park your car:
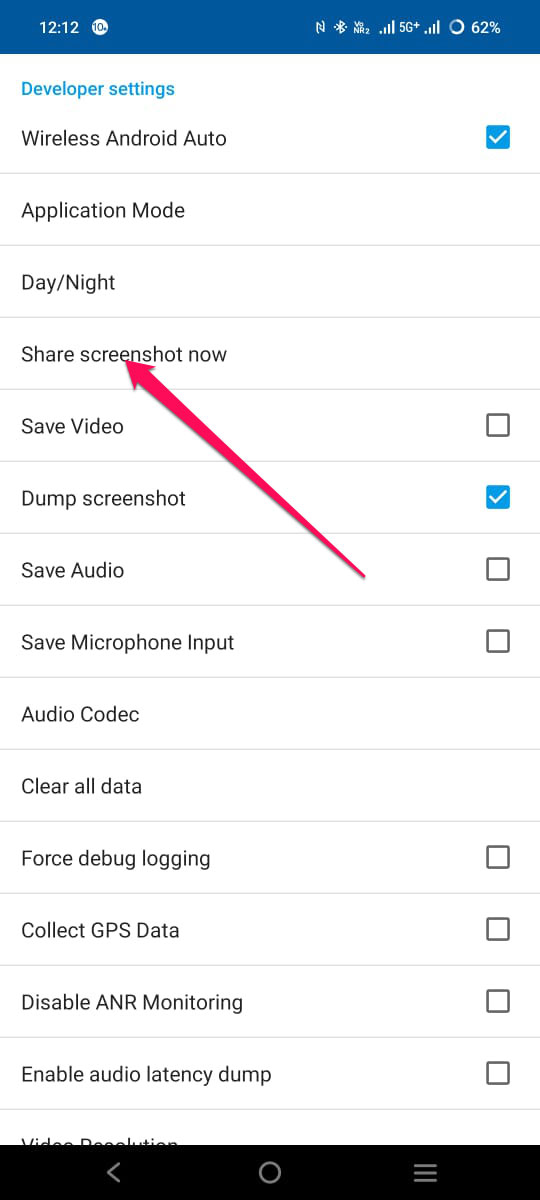
- Now, you have to go back to the settings on Android Auto.
- You can access these dev settings by tapping the overflow (⋮) menu in the top-right of any Chrome window, and select “Developer options.”
- Thereafter, tap Share screenshot now; this option will instantly take you to the screenshot editing app, where you can edit your screenshots and share them with most of the installed apps on your phone.
You must share the screenshot before you can save it locally. That is frustrating, but luckily, the solution you need to look for here revolves around storing these screenshots on your Google Drive.
Whatever you select and however it makes sense to how you, just don’t Always hit on the bottom of the screen — that means no matter what, always equals yes for Android Auto screenshots once you choose.
Tips for Taking Screenshots Safely
- Do Not Use While Driving: Take screenshots while parked to prevent distractions.
- Use Developer Mode Features Cautiously: Understand the settings excepted of you in Developer Mode.
So, that’s all we have for you on how to take screenshots in Android Auto. We hope that this guide has helped you. But that’s not end here. You can comment below and let us know if you have any doubts or queries.